

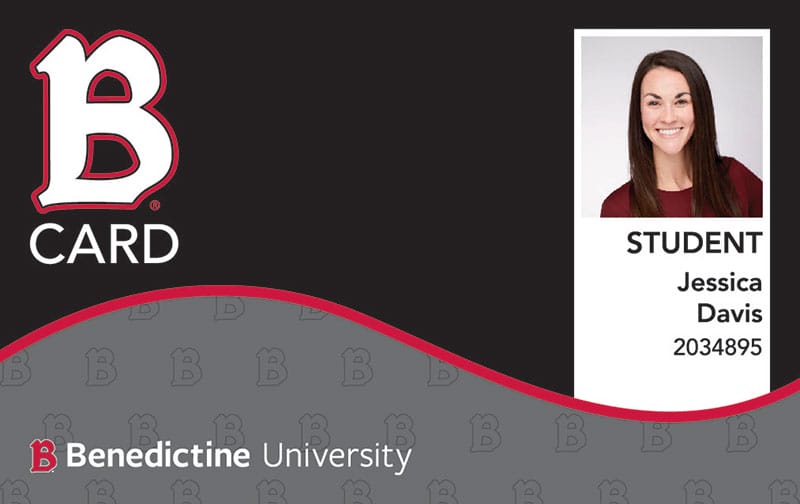
BCard

The Benedictine University BCard is our official campus identification card and is available to all enrolled students and current faculty and staff. Tap your iPhone, Apple Watch, Samsung Galaxy and other eligible Android phones at readers across campus to conveniently access your university credentials.
Your Mobile ID Card
- The BCard Mobile ID helps manage: Student Meal Plans, BBuck$, Dining$, and building access.
- Students, faculty, and staff can add their BCard to Apple Wallet, Google Wallet, or Samsung Wallet
- You can use this mobile ID just like a physical card!
Where can I use my BCard?
- Ondrak and Jaeger Halls (Residents and Staff only)
- Krasa Student Center
- Goodwin Hall of Business
- Rice Center
- Parking Garage (Staff only)
- Campus Store (in person only, not valid at the online store)
- Library
- Campus Eateries: Benny’s Dining, The Pub@Coal Ben, #COFFEE


How to submit your Official ID Photo Online:
a. If you have not done so already, set up your Benedictine University Network Credentials and multi-factor authentication by visiting account.ben.edu.
b. Go to eAccounts.ben.edu and sign in with your Benedictine University Network Credentials and multi-factor authentication.
c. In the menu, select Profile > Click to Submit a New Photo
d. Follow the process to submit a photo. Your photo and ID document must be submitted and approved before you can download the BCard Mobile ID.
Tips when submitting your photo:
-
- Be sure that photos are not in “live” mode.
- Photos that are too big will display a message stating the photo cannot be greater than 2MB, please crop the photo until it is just around your face and re-submit.
- Photos that are too small will display a message stating the photo must be greater than 300KB. Try taking a photo using the rear-facing camera and re-submitting.
Remember – heavily filtered photos will not be accepted (i.e. Snapchat) and that filters will also affect the size of the photo.
Criteria for photos:
YES
-
-
- Current color photo in jpg format
- Neutral color and smooth background
- Centered and front view of full face
- Cropped from just above the top of the head to the collarbone
- Proper lighting, we want to see you!
- Eyes open and visible
- Wear prescription glasses if you normally do so
- Photo size between 300KB to 2MB
-
NO
-
-
- Wear hats, sunglasses or other items that obscure the face
- Glare on glasses; closed eyes
- Shadows on the face
- Other visible people, pets, or objects in the photo
- Inappropriate expressions
- Group photos
- Black and White photos
- Photos with your hand resting on your face
- Crop off the top of your head or side angle of your face
-
New students attending orientation can obtain a BCard as part of the program’s schedule.
Not attending orientation, no problem! You will need to follow these steps:
1.) Student Identification Number
Before starting the BCard process, be sure you have been issued a Benedictine University Student Identification Number and enrolled in classes, which authorizes you to receive a BCard. If you have not or are unsure, contact Student Accounts.
2.) Getting your Official ID Photo
The University Official ID photos are processed and managed by Campus Safety. Students can get their Official ID photo by visiting the Campus Safety office or by submitting the photo online. Both in person and online submitted photos will require accompanying government issued documentation for identity verification. For concerns related to providing government issued documentation, contact Student Life.
How to submit your Official ID Photo Online:
-
- If you have not done so already, set up your Benedictine University Network Credentials and multi-factor authentication by visiting account.ben.edu.
- Go to eAccounts.ben.edu and sign in with your Benedictine University Network Credentials and multi-factor authentication.
- In the menu, select Profile > Click to Submit a New Photo
- Follow the process to submit a photo. Your photo and ID document must be submitted and approved before you can download the BCard Mobile ID.
3.) Getting Your BCard
-
- Physical BCard – After your online photo has been approved, visit the Campus Safety office to request and obtain your physical ID card.
- BCard Mobile ID – go to the Setting Up Your BCard steps below to learn more.
A student’s BCards is active from the first term of enrollment until four months after the last date of the last term of enrollment.
New students can get support for their BCard by contacting the Help Desk at (630) 829-CARD (2273) or email at [email protected] during business hours, Monday through Friday.
Setup Instructions
Managing Your BCard with eAccounts
Your BCard can be managed using a web browser or installing a mobile App.
BCard utilizes a management platform called “Transact eAccounts”.

BCard Web Portal and Mobile App Management
BCard utilizes a management platform called “Transact”. The BCard can be managed online by visiting the BCard eAccounts web portal or installing and using the BCard eAccounts mobile App.
BCard eAccounts Mobile App
If you haven’t done so already, from the App Store or Google Play Store, search for, download and install the ‘Transact eAccounts’ App to your mobile device.
BCard eAccounts Web Portal
Manage your BCard online anytime by visiting eAccounts.ben.edu. Sign in using your university network credentials.
BCard Support
Students, Faculty, and Staff can get support for their BCard by contacting the Help Desk at (630) 829-CARD (2273) or email at [email protected] during business hours, Monday through Friday.
eAccounts
Student Meal Plans
You can check the balance of these accounts and transactions at any time through eAccounts*.
*To check on the number of Meal Plan swipes remaining, login to eAccounts and select Board Transactions. Then select a time frame. You will see the number of Meal Plan swipes used out of the total number you started with. Subtracting these two numbers will give you the remaining Meal Plan swipes you have left.
BCard Terms and Conditions (Disclosure)
The BCard is the official identification card of Benedictine University. Use of this card constitutes acceptance of all applicable University Policies, including these ”Terms and Conditions”. Benedictine University reserves the unrestricted right to modify these Terms and Conditions from time-to-time, with the modifications to be posted to the University’s website. Violation of any of the following Terms and Conditions contained in this “Disclosure” may result in the confiscation of the card and/or a referral to the appropriate University office for disciplinary action (e.g., Human Resources, Student Conduct or University Police).
1. The BCard
The BCard, BCard Mobile ID and temporary card alternatives identify the Cardholder as a student, faculty, or staff member of the University. The BCard (physical or mobile) should be carried at all times and presented to University officials upon request. The card is also the mechanism for accessing the Cardholder’s Stored Value Accounts, (e.g. BBuck$ campus cash, meal plan swipes, or dining dollars). The Cardholder must present their card at the time of use in order to purchase products or services. In addition, the BCard can be used for door access, gain admission to athletic events and intramurals, or track attendance.
1) The BCard is the property of the University and is non-transferable. The Cardholder may not loan their card to another student, University employee or other individuals. Cardholders may not lend any of their smart devices that have been provisioned with their BCard ID Card to another student, University employee or other individuals with the intent to have the individual use their BCard Mobile ID. Any attempt to use or obtain a BCard for fraudulent purposes or to assist in doing so may subject the Cardholder to disciplinary action, including referral to the Benedictine University’s Student Conduct, Human Resources, or University Police.
2) The BCard may be suspended, terminated or confiscated from the Cardholder and/or BCard Mobile ID accounts may be deactivated due to inappropriate or illegal use or failure to comply with these Terms and Conditions.
3) All students are eligible for an initial prepaid BCard as part of the student fee upon beginning their first term at the University.
4) All University faculty/staff will receive an initial free BCard upon their start date.
2. Replacing Lost, Stolen or Confiscated Cards
Cardholders are obligated to report lost or stolen cards immediately to the University Police by calling (630) 829-6666. A lost or stolen card may be deactivated/reactivated online by visiting eaccount.ben.edu or for additional support contact the Help Desk at (630) 829-CARD (2273) or by email at [email protected] during business hours, Monday through Friday. Once the Cardholder reports a lost or stolen card to University Police, they must contact the Help Desk to reactivate a card before it can again be used.
The Cardholder is responsible for paying the replacement fee for the re-issuance of a card. Replacement cards may be obtained by visiting University Police. A $20 fee will be imposed to replace a lost, stolen or confiscated BCard.
Students who have provisioned the BCard Mobile ID on a smart device are obligated to report if their device is lost or stolen. Cardholders may deactivate their device by logging into eAccounts and selecting “Deactivate Device” within the Card Services section. The Cardholder can reactivate their account at no cost if they find their device or purchase a new one. Report the lost or stolen device to the University Police by calling (630) 829-6666. For additional support, contact the Help Desk at (630) 829-CARD (2273) or by email at [email protected] during business hours, Monday through Friday.
3. Replacing Damaged Cards
No charge will be imposed to replace a BCard that ceases to function due to normal, daily usage. Characteristics indicating normal usage are a scratched or worn stripe, frayed or peeling plastic overlay, or horizontal breakage/cracking. Characteristics not indicating normal usage are broken edges or corners, hole punches and vertical breakage/cracking. A charge will be imposed for the replacement of a BCard not indicating normal usage. The determination of whether a card has been damaged by normal usage is at the sole discretion of the University.
4. Stored Value Accounts
Stored Value Accounts (SVA), are discretionary spending debit accounts for pre-deposited funds, which the Cardholder accesses to purchase products and services. There are multiple SVAs available to a Cardholder, depending on University classification (student, faculty/staff).
1) Stored Value Accounts (SVA) are as follows:
a) Meal Plan Swipes (purchased as a part of a meal plan program)
b) Dining Dollars (purchased as a part of a meal plan program)
c) BBuck$ (campus cash)
2) Meal Plans (block meal swipes) and Dining Dollars (declining balance) may be purchased at the start of the fall or spring semester.
a) Resident students can purchase a meal plan through the University’s housing portal.
b) Commuter students can purchase a meal plan by visiting dining.ben.edu.
c) Meal Plan block meal swipes expire at the end of each semester.
d) Dining Dollars (declining balance) roll over from fall semester to spring semester but expire at the end of the spring semester.
3) BBuck$ (campus cash) deposits may be made at any time; the minimum deposit amount is $5.
a) Eligible deposits may be made as follows: i) Online at bcard.ben.edu
ii) In-person, at Student Accounts
iii) In the eAccounts app (if credit card information was previously added to the Cardholder’s eAccount and they are a BCard Mobile ID user).
b) BBuck$ do not expire.
4) There is no limit on the number of transactions per day. Purchases shall not exceed the amount of deposited funds.
a) No interest shall be paid on any balance on the Cardholder’s SVA.
b) The Cardholder understands and agrees that their SVA may not be used as a credit card or to purchase gift cards or money orders.
c) The BCard does not carry cash advance privileges.
d) A Cardholder’s SVA may not be withdrawn except as provided for in Section 8, Stored Value Account Closures.
e) Stored Value Accounts are non-transferable
f) Transfer of funds between Stored Value Accounts is not permitted.
5. Fees
a. There are no processing charges assessed to the Cardholder for any BCard transaction(s) made in accordance with all applicable requirements.
b. Deposits made by check. A check presented for a deposit that is returned due to insufficient funds will be assessed a fee according to the customary fee schedule followed by Student Accounts. The Cardholder’s SVA will be deactivated until the Cardholder deposits sufficient funds to cover both the overdraft amount and the insufficient funds fee. (See Section 8 below for fees assessed upon Stored Value Account closure.)
c. Account inactivity. SVA can remain active indefinitely; however, accounts that remain inactive for a period of six (6) months will be charged a $1 per month “Inactive Fee” for each inactive month thereafter to avoid funds being sent (“escheated”) to the State of Illinois or the State of Arizona, as applicable, in accordance with state law regarding unclaimed property/assets. However, the University is under no obligation to escheat any SVA account balance to the applicable state governmental authority (Illinois or Arizona) where the balance in question falls below the minimum amount under state law regarding unclaimed property /assets.
6. Refunds and Returns
Merchandise may be accepted for return in accordance with the refund policy in effect at the place of purchase of the product(s) or service(s). Any refund(s) shall be credited to the Cardholder’s SVA; no cash refund(s) will be made for any purchase made with the BCard.
7. Liability for Unauthorized Purchases
The University complies with the requirements of the Federal Truth in Lending Law. If a BCard or a device that has been provisioned with BCard Mobile ID is lost or stolen, the Cardholder is responsible for no more than $50 in unauthorized Stored Value Account purchases, provided the BCard or Mobile ID is reported as lost or stolen to University Police as required under Item 2 above within two (2) calendar days of the loss or theft. Once the BCard or Mobile ID is reported as lost or stolen, the card (and its associated SVAs) will be deactivated and the Cardholder is not responsible for any subsequent card purchases. Should the Cardholder report their BCard or Mobile ID lost or stolen after two days of the loss or theft, but within sixty (60) days after the
issuance of an Account Activity Statement containing any unauthorized purchase(s), the Cardholder is responsible for no more than $500 in unauthorized purchases. If the Cardholder fails to report that their BCard or Mobile ID was lost or stolen within sixty (60) days after the issuance of an Account Activity Statement containing any unauthorized purchase(s), then the Cardholder limit of liability for any unauthorized purchases will not apply.
8. Stored Value Account Closures
a. Cardholders may request that their SVAs be closed only upon officially separating (terminated, retired, graduated, withdrawn, etc.) from the University. Cardholders are not required to close their SVA upon separating from the University and may continue to access remaining funds at campus merchants until such time as they elect to close their accounts or their SVA are closed pursuant to Item 8.f or 8.g.
b. Subject to the closure requirements of Item 8.a, Cardholders with card balances greater than $10 may request an account closure refund by submitting a BCard/ODA Refund Form online at bcard.ben.edu. Except as provided in Item 8.d, balances of $10 or less will be retained as an account administrative fee, and in such cases, the account will be closed out with no funds left to be sent to the Cardholder.
c. The $10 Administrative Fee will be waived for any deceased Cardholder or a student who withdraws from the University with “extenuating circumstances” (as determined under the University’s applicable Academic Policies). Benedictine University may also waive the Administration Fee at its sole discretion.
d. Upon account closures, any refund processed from the Cardholder’s SVA, after the Administrative Fee is deducted, will first be applied toward any debt the Cardholder owes to the University and any remaining balance will be refunded to the Cardholder. The Cardholder will remain responsible for any debt the Cardholder owes the University that is not fully paid by applying the Cardholder’s SVA balance to such debt in accordance with this process.
e. A Student refund will be posted as a credit to the Cardholder’s Student Account and shall be disbursed by the University following the regularly scheduled refund procedures. Non-student refunds will be issued by ACH to the last bank account on record (employees with payroll direct deposit) or by check to the last known address on record (all other non-student Cardholders). Students with any questions on the BCard refund policy should direct their questions to [email protected]. Faculty/staff with any questions on the BCard refund policy should direct their questions to [email protected].
f. The University retains the right to close (or otherwise restrict) the BCard SVA activity of any Cardholder owing a debt to the University or that of any Cardholder suspected of fraudulent or illegal card activity, in each case, after following the procedures set forth under these Terms and Conditions and any requirements under applicable law.
g. In the event an account closure ACH refund is rejected by the Cardholders bank, or if the United States Postal Service returns a refund check as undeliverable to the Cardholder, or if the address of a Cardholder cannot be reasonably determined, the SVA balance refund shall be escheated by the University to the State of Illinois or the State of Arizona, as applicable, per state law. However, the University is under no obligation to escheat any SVA account balance to the applicable state governmental authority (Illinois or Arizona) where the balance in question falls below the minimum amount under state law regarding unclaimed property /assets.
9. Receipts and Statements
If the point-of-sale terminal is equipped to provide a receipt for a transaction, the Cardholder will receive a receipt as a matter of course or upon request. It is the Cardholder’s responsibility to ensure that the receipt is correct. Monthly statements are available online at bcard.ben.edu.
10. Error Resolution
a. Errors that occur while using an SVA at a retail location or dining hall should first be addressed at the location where the error occurred. A request for a refund should be made by the Cardholder via an adjustment form to be completed by the retail staff to address the error. The form will be emailed from the retail location to the Help Desk for processing. An email will be sent to the Cardholder’s University email account once the funds have been redeposited.
b. If there is an error on a receipt of the Activity Statement, or if the Cardholder would like more information about a specific transaction, they may contact the Help Desk at (630) 829-CARD (2273) or by email at [email protected] within sixty (60) days of the Activity Statement date.
c. Where the Cardholder provides verbal notification of an error, the University requires that the Cardholder submit a written notification within 3 calendar days of the verbal notification.
d. When requesting an adjustment to an SVA, the Cardholder must furnish the following information in writing: (1) the Cardholder’s name and SVA name; (2) the date and dollar amount of the transaction in question; and (3) a description of the transaction in question, including an explanation of the discrepancy.
e. The University will investigate the Cardholder’s request and provide a written finding to the Cardholder. If an error is found, the University will make the necessary adjustments to the Cardholder’s account. If no error is found, the University will provide the Cardholder with a written explanation after the investigation. The Cardholder may request copies of the document(s) used to conduct the investigation.
11. Disclosure of Account Information to Third Parties
Information about the Cardholder’s Account will be disclosed to third parties only:
a. To complete a transaction;
b. To comply with a government agency or court order or lawfully issued subpoena. In such cases, if permitted, the University will provide Cardholder notice of its obligation to comply with the order or subpoena;
c. In conjunction with all other Cardholder accounts, such information to be “aggregated” so as not to identify any specific Cardholder or specific Cardholder account;
d. To provide the University with the Cardholder’s image, use of which is restricted solely to internal identification purposes, including but not limited to the generation of photo-based class rosters;
e. With Cardholder’s written permission; or
f. As otherwise permitted under Benedictine University Privacy Policy and applicable law.
12. Changes in Terms and Conditions
The Terms and Conditions of this Disclosure are effective and remain binding until the Cardholder is otherwise notified in writing of any changes by the University. If any changes are made to these Terms and Conditions, the University shall provide the Cardholder with notice of change(s) at least twenty-one (21) days in advance of the effective date by posting the change(s) to the University’s website. However, prior notice need not be given where an immediate change in any of these Terms and Conditions is necessary to maintain or restore the security of the Cardholder’s Account, is necessary to comply with applicable law or policy, or constitutes a technical correction to these Terms and Conditions, in each case, as may be determined by the University.
13. Red Flags Rule
Benedictine University obeys the “Red Flags Rule”. The Rule requires many businesses and organizations to implement a written Identity Theft Prevention Program (“ITPP” or “Program”) designed to detect the warning signs (“Red Flags”) of identity theft in their daily operations. The purpose of this Program is to detect, prevent, and mitigate identity theft at the University. Details of the University’s ITPP can be found at the “Red Flags Rule web page” on the University’s website.
14. Governing Law/Venue
If the Cardholder is a student or faculty/staff member of the University’s Lisle, IL campus, then any disputes arising in connection with the Terms and Conditions contained in this Disclosure or the use of the BCard shall be governed by and construed according to the laws of the State of Illinois and such Cardholder expressly consents to the jurisdiction of the courts located in DuPage County, IL for such litigation. If the Cardholder is a student or faculty/staff member of the University’s Mesa, AZ campus, then any disputes arising in connection with the Terms and Conditions contained in this Disclosure or the use of the BCard shall be governed by and construed according to the laws of the State of Arizona and such Cardholder expressly consents to the jurisdiction of the courts located in Maricopa County, AZ for such litigation. ALL CARDHOLDERS VOLUNTARILY WAIVE ANY RIGHT TO A JURY TRIAL THEY MAY HAVE REGARDING ANY SUCH LITIGATION.
Students, Faculty, and Staff can get support for their Benedictine University BCard by contacting the Help Desk at (630) 829-CARD (2273) or email at [email protected] during business hours, Monday through Friday.